Element Properties Menu
BadgeMaker Design
Element Properties Menu BadgeMaker Design The element properties window has three tabs:
- Element edit tab
- Element position tab
- Element style tab
Depending on the type of element, this tab will allow the user to view and/or edit the information of the element. When the values are changed they are reflected immediately in the design; there is no need to hit an enter button. The user can make changes in one window and observe the result in the other window at the same time and vice versa. It depends on the preference of the user to create the layout in a graphical environment or a data element environment.
| Element Properties |
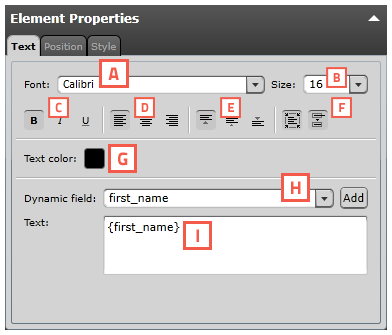
Fig. Example of the Text element properties
|
Text element
A. Change Font
B. Change Size
C. Edit style into bold, italic and underlined.
D. Outline the text left, center or right
E. Align the text to top, center or bottom of the box.
F. Wrap text automatically or let text be cut of when being to long.
G. Give the text color by clicking on the color box.
H. Choose to add a dynamic field to the text box below by selecting one out of the drop down menu and clicking on the “Add” button.
I. Enter all you text here. |
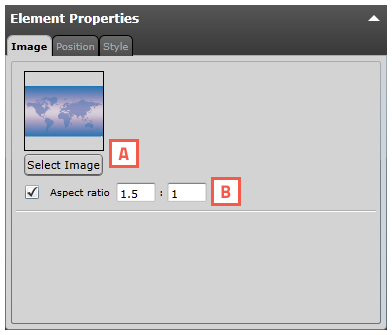
Fig. Example of the Image element properties |
Image element
A. Select an image from your computer by clicking on the “…” button.
B. Choose to bind the ratio
C. Select an image that already as been uploaded into BM design. |
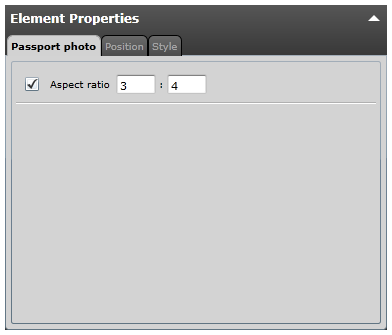
Fig. Example of the PassportPhoto element properties |
Passport Photo element
A. Check box to bind the element to a certain ratio. |
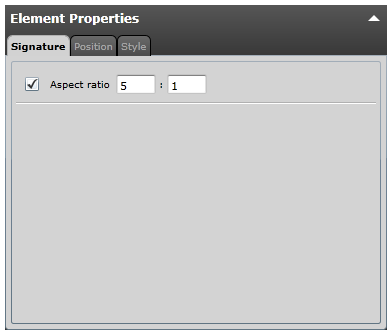
Fig. Example of the Signature element properties |
Signature element
A. Check box to bind the element to a certain ratio. |
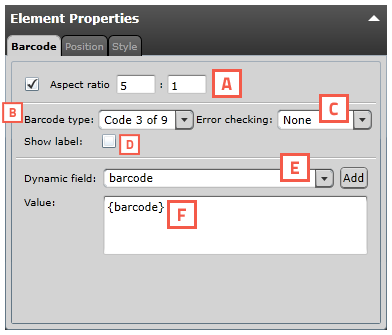
Fig. Example of the barcode setup of a element properties. |
Barcode element
A. Check box to bind the element to a certain ratio
B. Choose a Barcode type by clicking on the drop down box and selecting the needed option available.
C. Select a form of error checking from this list to ensure a correct working barcode.
D. If you want the Barcode to show a label with the real data check the show label check box.
E. Select the dynamic field that you want the barcode to reflect, click the “Add” button to add the dynamic field to the value. You can also type in a value for the barcode.
F. Enter a default value or combine it with a dynamic field. |
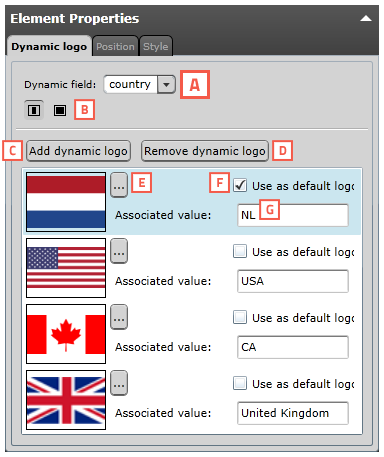
Fig. Example of the dynamic logo setup
element properties. |
Dynamic logo element
A. Select the dynamic field that you want the Dynamic logo to reflect.
B. Select if you want the logo to be the correct ratio or if you want it to fill the whole field.
C. Click on this button to add the dynamic logo.
D. When you want to delete a dynamic logo select the logo you want to deleter first and then click on the “Remove dynamic logo” button.
E. Select an image for you dynamic logo by clicking on this button.
F. Check the default box if you want this image to show up as the default dynamic logo image.
G. If you want to add a value to your Dynamic Logo enter the data into this field. |
| Position |
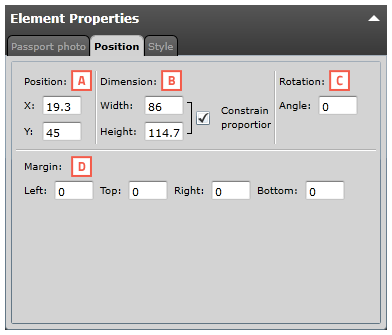
Fig. Example of the position setup of a element. |
A. Determine the position of the used element.
B. Scale your element giving a width or a height. Check the check-box to keep the element proportion the same as the original.C. Rotate the element by entering an angle number from 0 to 360.
D. Give your element margins to give your the element needs margin space around. |
| Style |
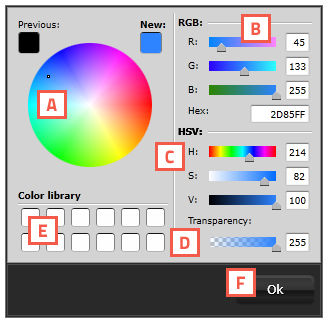
Fig. Example of the Color popup menu
|
Choose a color for the line or the background using the color window. You can use:
A. the color picker
B. RGB sliders
C. HSV sliders
D. Add Transparency
E. Color library using saved colors that you can drag into the library.
F. Click on “Ok” when you selected the correct color. |
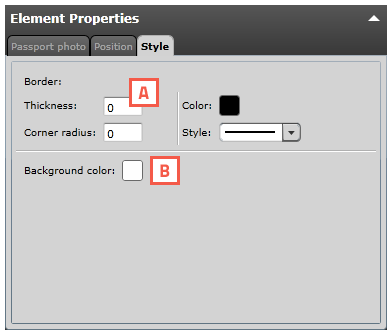
Fig. Example of the style tab |
A. You can change the thickness of the line, its color or style and the
B. background color of an element. |


