4. Configuring a data source through an ODBC driver
After selecting ODBC as the type of data source, you will be able to select one of the ODBC drivers installed on your system. Please note that Windows may have more than one driver installed per file extension. In this example, we have selected the Microsoft Access Driver (*.mdb) for our data source (see item “B“ in the screenshot below).
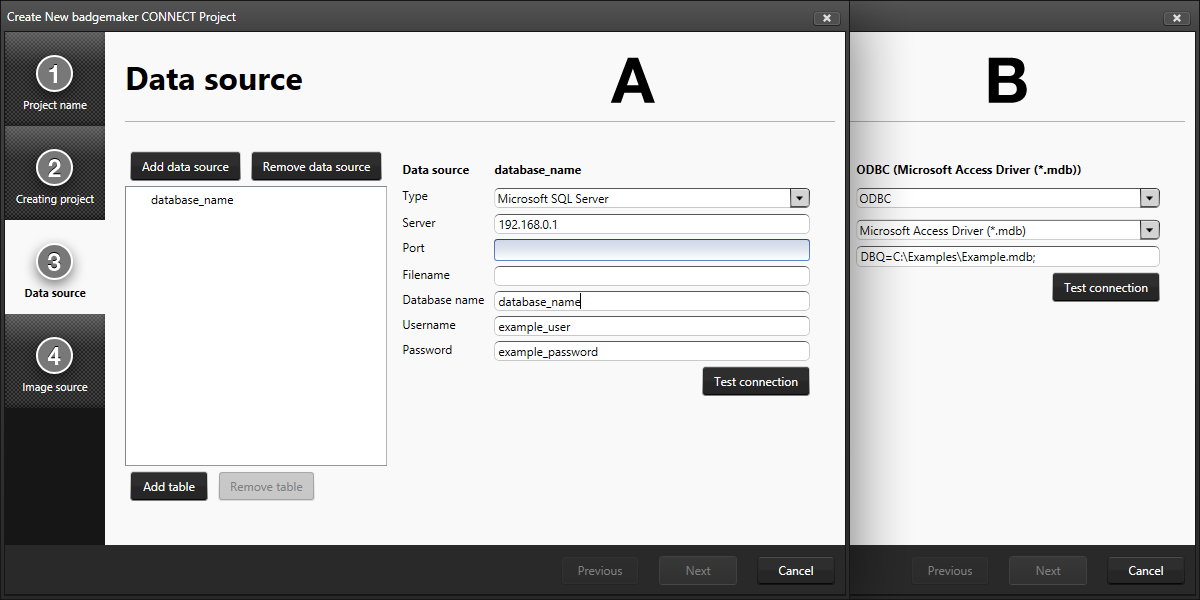
After selecting the driver, you are able to provide a direct path to your database file. This can be a local path (C:\Example\Example.mdb) or a remote path (\\Server\Example\Example.mdb). Note that in order to be able to open your project using a remote directory, an active network connection must be available.
After configuring the data source, click the button “Test connection”. Once the dialogue reports “Connection OK!” you are able to proceed. If the connection cannot be established, the dialogue will report a detailed overview of the problem. Check all information and make sure a connection with the external server is available before trying again.
Once the connection is established, click “Add table” in order to continue configuring your data source. A pop-up dialogue will list all tables available for you. Microsoft SQL Server will likely only list database tables, where other files (such as MS Access databases) might also list tables otherwise invisible to the user. After selecting a table, you are able to configure the rights to the table, and to each of the listed columns in the table. Users connecting with a Microsoft SQL Server will also be able to create and remove rows, whereas users connecting through an ODBC database will only be able to select the “Edit data” checkbox for existing rows.
Note that the newly created data source will have the “Primary table” checkbox checked. This setting can only be altered during the process of defining the data sources, so make sure that the primary table is correctly configured.
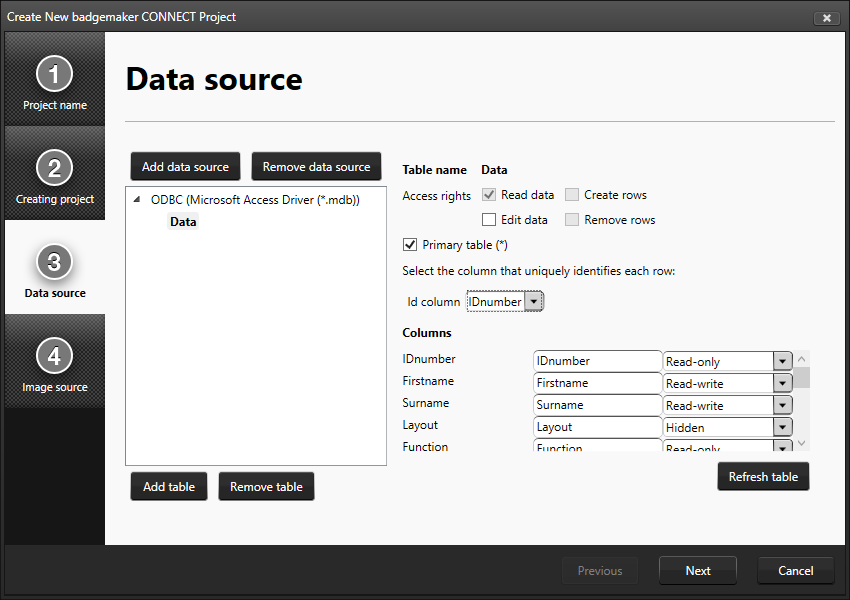
For a primary table, you are able to define the “Id column” this is a column containing unique, numeric data. For secondary tables, you have to define its relation to the primary table or to one of the tables linked to the primary table. This means that each table will have to contain a column containing a corresponding type and kind of data. It is advised to keep the column marked as “Id column” as read-only or even hidden if the data in the column is not crucial to users working with the data grid.
The list of columns can be used to define certain restrictions to each column such as “Read-only” or “Hidden”. By default, columns will be marked as “Read-only”. Think carefully about what data you want to manage through BadgeMaker, and what data should be managed by other external systems.
Once complete, you are able to define the image sources for Passport Photos and Signatures in your project. You are able to choose from three different options:
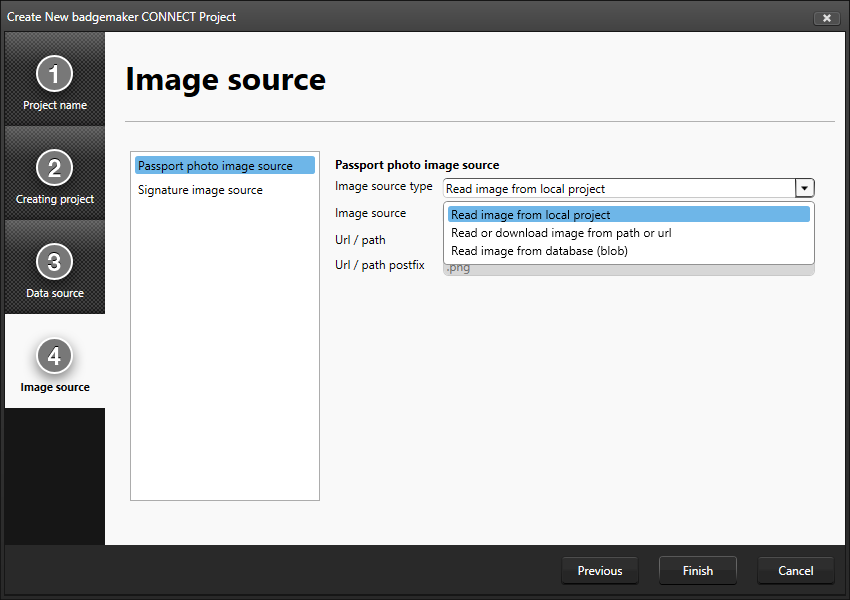
- Read image from local project
Selecting this option stores captured images along with the BadgeMaker Identity project files. This option can be used to capture new image data. - Read or download image from path or URL
This option allows you to read images from a remote directory either on a server or on a network drive. This can only be used to read image data. New data cannot be captured. - Read image from database (blob)
This allows you to read an image from a specific column in the databased marked as BLOB (Binary Large Object) This option can be used to both read existing data and capture new image data to the database.
Images will have to be linked to a record in the database in the same way data sources are linked to each other. It is highly recommended to choose the “ID column” of the primary data source as the source. BadgeMaker Connect will use the filenames of the images to match between images and records. Only exact matches will be imported in the project.
Once all the steps have been completed, click “Finish” and your project will be created.