FAQ BadgeMaker

How to setup a trigger that reads and writes the card serial number from a card to your project.
Step 1. Open your project
Open an existing project with card designs and data.
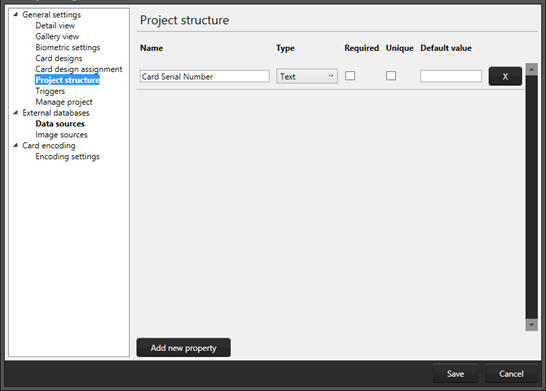
Step 2. Create an extra column for the card serial number
Add an extra column to your project. BadgeMaker Identity can read the serial number of the printed card and write to the record in that column.
Go to “Edit” in the main menu and go to “Project Settings” and click on “Project Structure”. Click on “Add new property” and name this text data column: Card Serial Number.
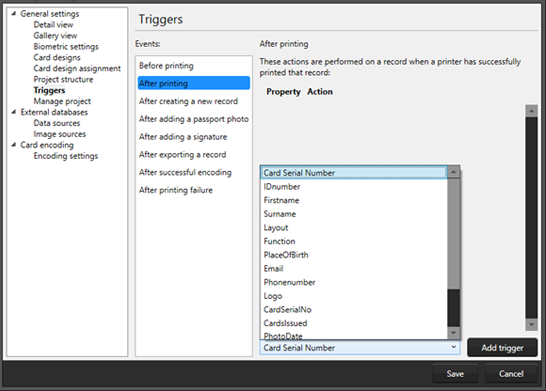
Step 3. Add the trigger “after printing”
Go to “Edit” in the main menu and go to “Project Settings” and click on “Triggers”. Now add a trigger on the event “after printing”. Click on the event “After printing”. Now select the data field from the drop-down and add a trigger on “Card Serial Number” and click on “Add Trigger”. BadgeMaker Identity can read the serial number from the smart card and write to your project after printing.
Step 4. Set the trigger to “Set card serial number”
After adding the trigger for the serial number column, select the action “Set card serial number” from the drop-down menu. Also check the first box on how to write the serial number to significant byte first, same as the encoding file.
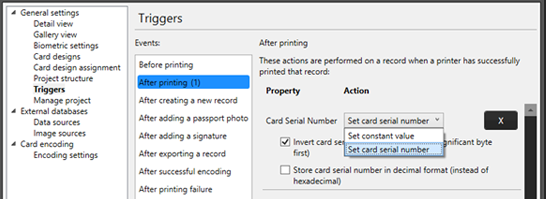
Do not forget to save this trigger setup.
Step 5: Link an empty CCI file to your card design
Create an empty CCI file using the CCI Editor and link it to your card design. This will ensure that BadgeMaker will read the card’s serial number so that it is available in the trigger above.
You have now setup the trigger and BadgeMaker Identity will add the serial number to the column for the record that has been printed.